Eclipse/Moonshot - 1lb Combat Robot
Eclipse is my 1lb combat robot designed to compete at UIUC's 3D printed 1lb weight class as well as hobbyist competitions allowing any material (where it is referred to as "Moonshot" to avoid confusion). I designed Eclipse, a combat robot with a vertically spinning drum and a custom-made brushless motor drive system. Its defining feature is that rather than using an off the shelf motor and gearbox combo, the robot utilizes a custom gear and pulley reduction which integrates into the frame of the robot with a high-power motor to achieve a uniquely zippy and powerful drivetrain.
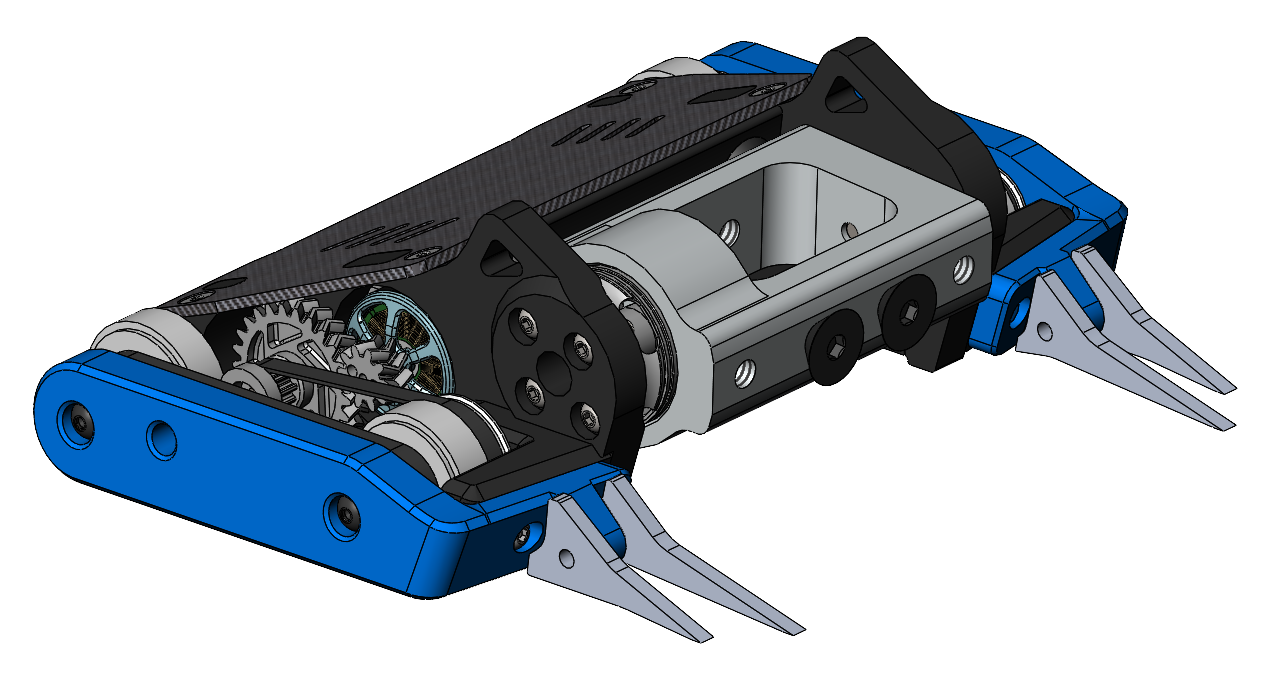
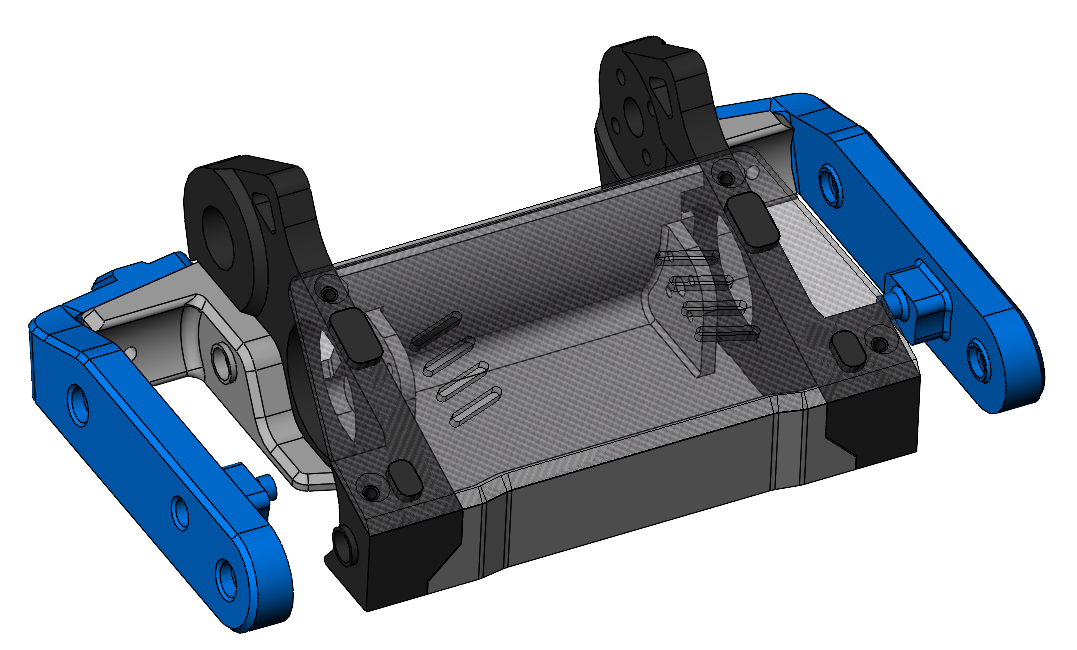
CAD model of Eclipse in its full-combat configuration (Moonshot)

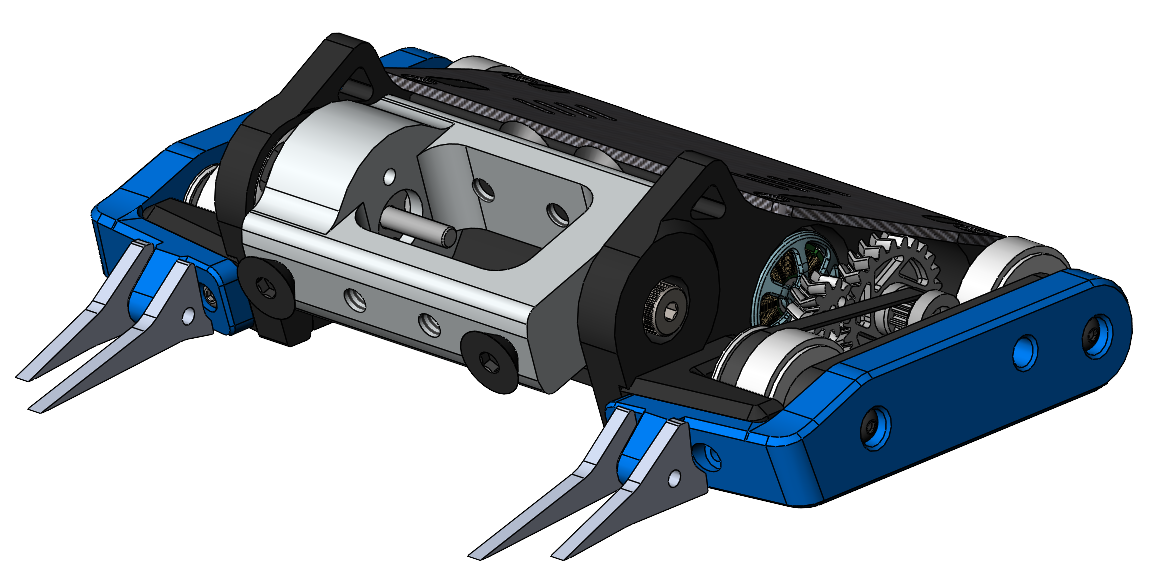
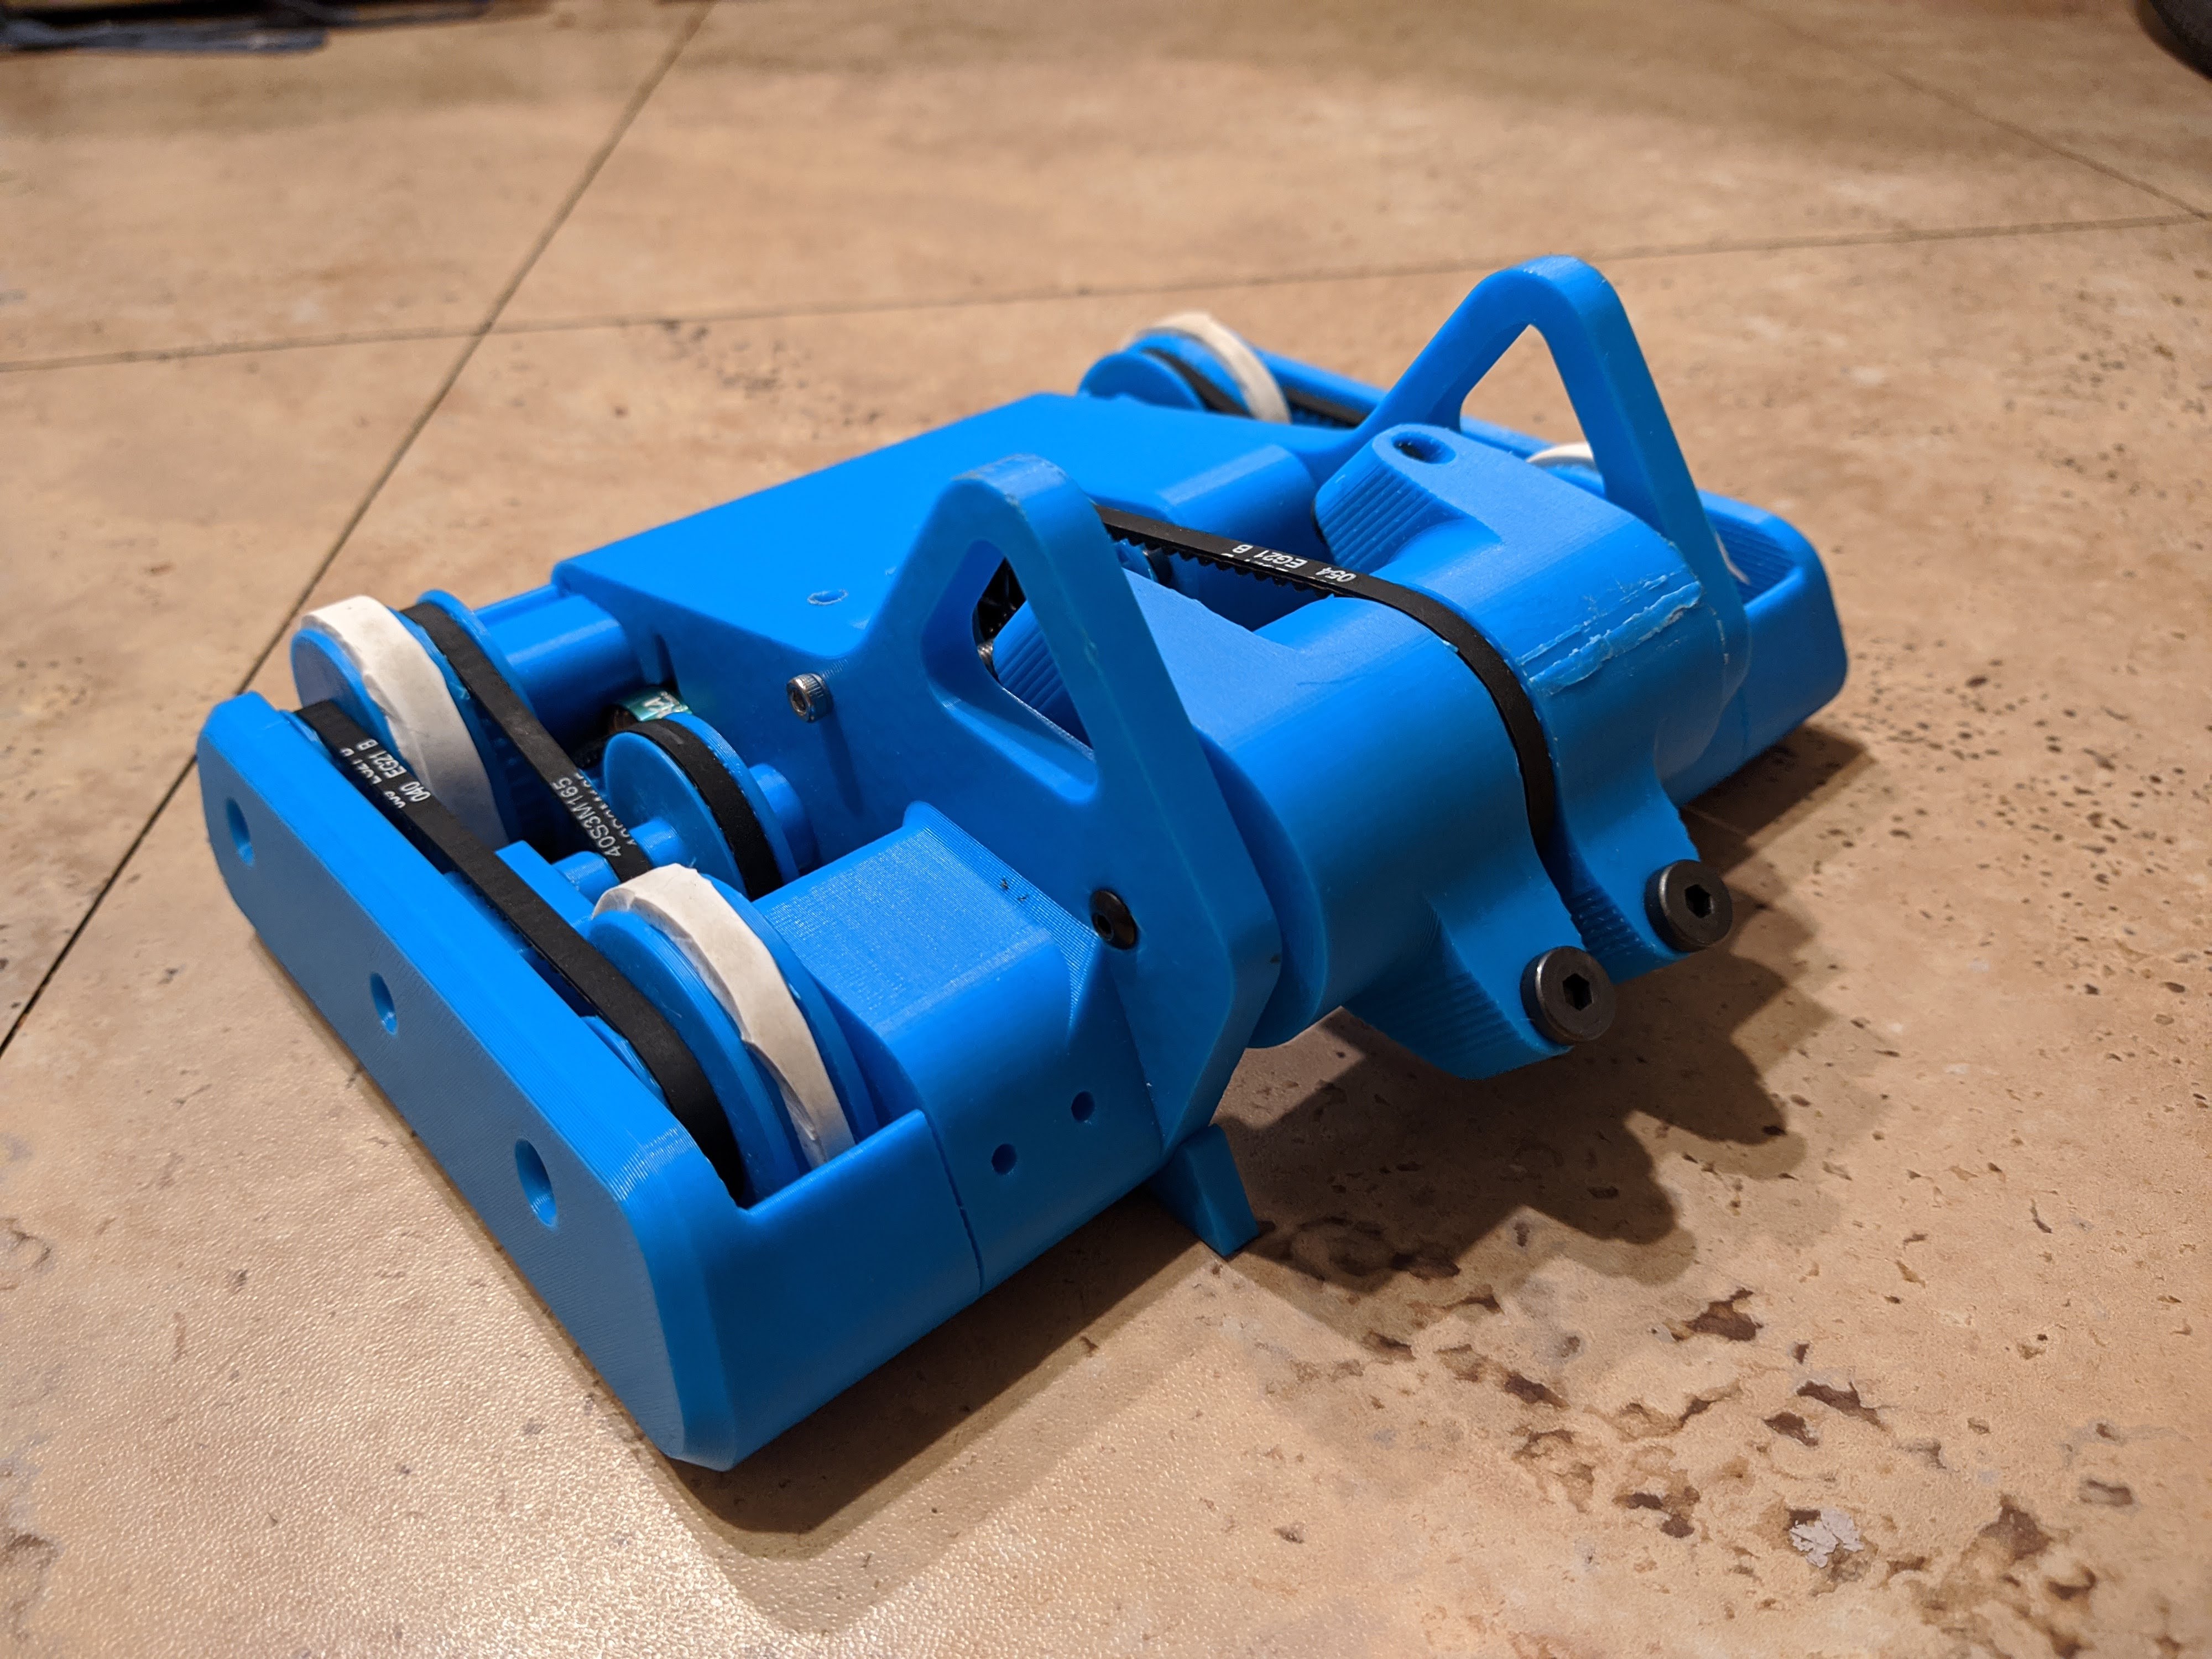
Eclipse in its configuration for plastic 1lb competitions
A compilation of my fights at a recent tournament. Moonshot placed 7th out of 32 bots.
Design Narrative
Drive
Eclipse makes use of a 2004 sized drone motor with a custom 6.1:1 two-stage reduction used to reduce the high-speed output to a higher torque output at the wheels. The 1st reduction stage utilizes a 3D printed pinion gear which can achieve a more compact reduction compared to a belt reduction. From then on, belts are used to transfer power allowing for more freedom in placement of the components. Small wheels also helped to reduce the package size.
Robot with its chassis transparent to show drive system.
A driving design constraint was size. The reduction had to be packed into a small enough package in order to keep the size of the frame down, saving weight. Using pinions that were as small as possible, and making smart use of solidworks sketches allowed me to position the components and choose pulley, gear and belt sizes to reduce the overall footprint of the gearing. A previous iteration of this robot was very overweight and fragile due to improper size constraints, so this was a critical item to get right. (Scroll down below for this previous iteration)
In choosing drive electronics, I proritized finding low "Kv" motors which would have a low speed and produce high torque from low current so that the required gearing would be less. In addition, they should be lightweight and be in a suitable package to fit well into the robot. Yet, they needed to be plenty powerful: I had decided this robot's gimmick would be its overwhelming drive power. The 2004 drone motors I found were the best option that would fit the bill. Coming in at only ~16g and outputting several hundred watts, they certainly did the job.
Weapon
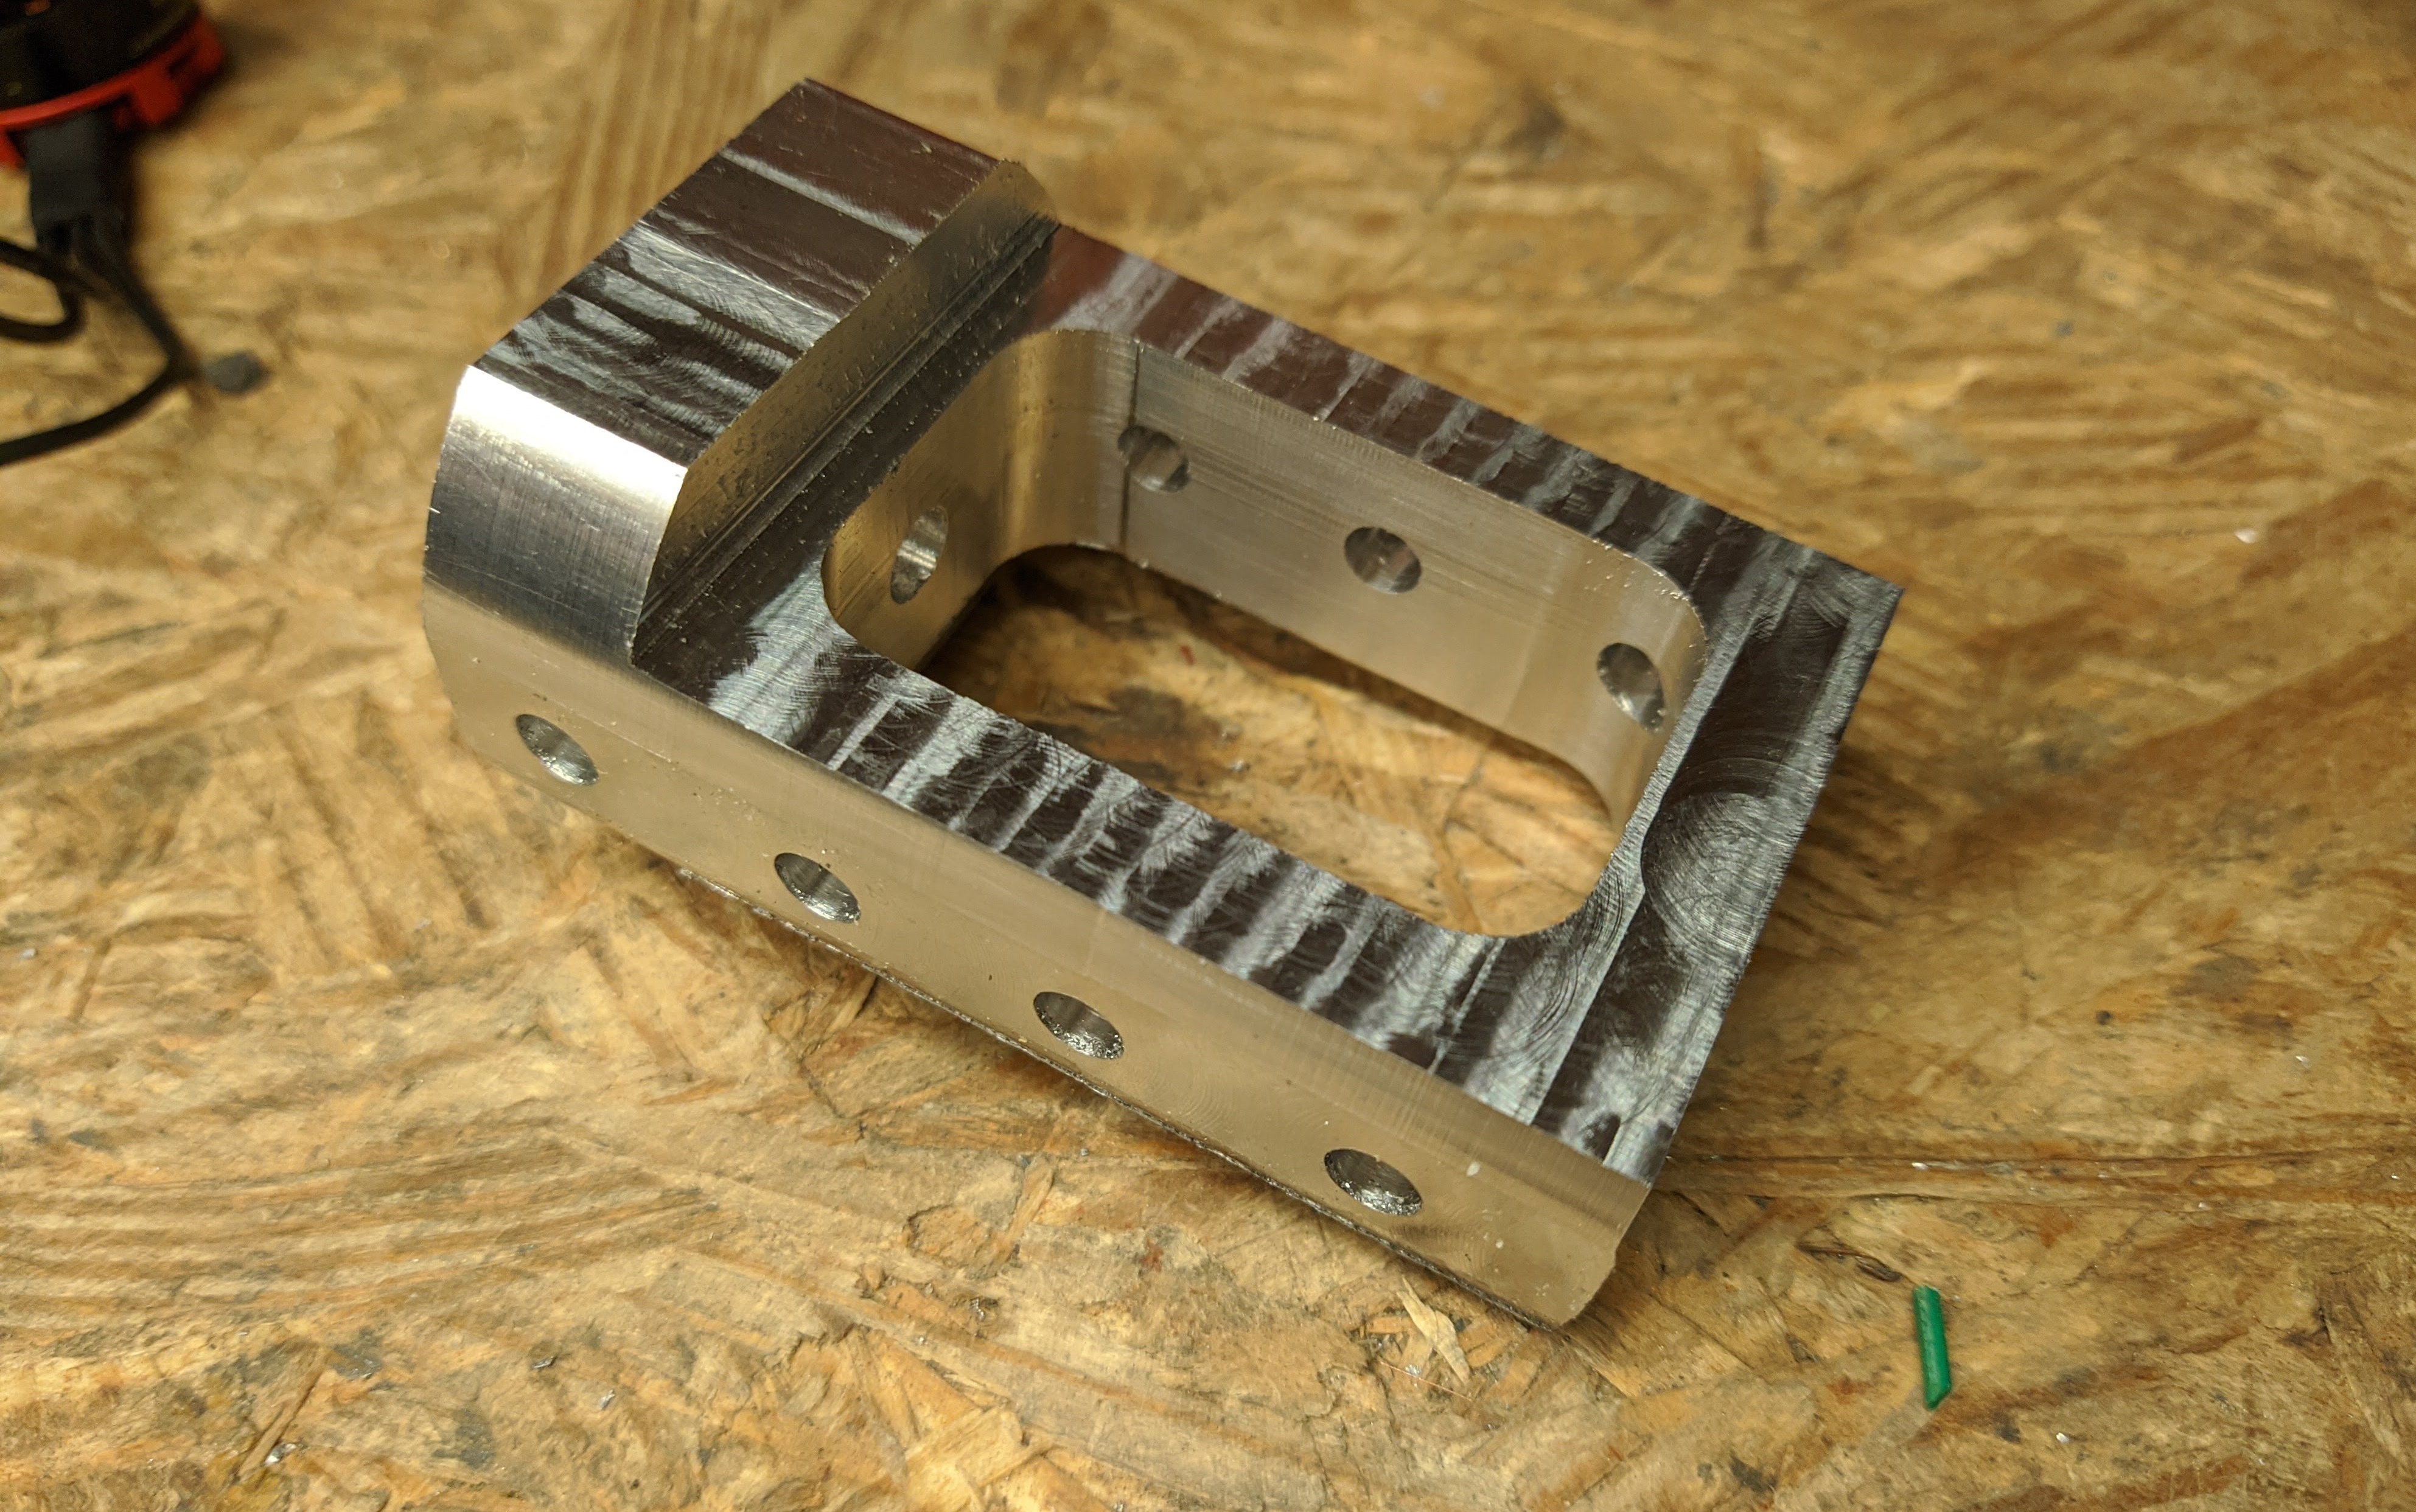
Moonshot's 7075 Aluminum weapon
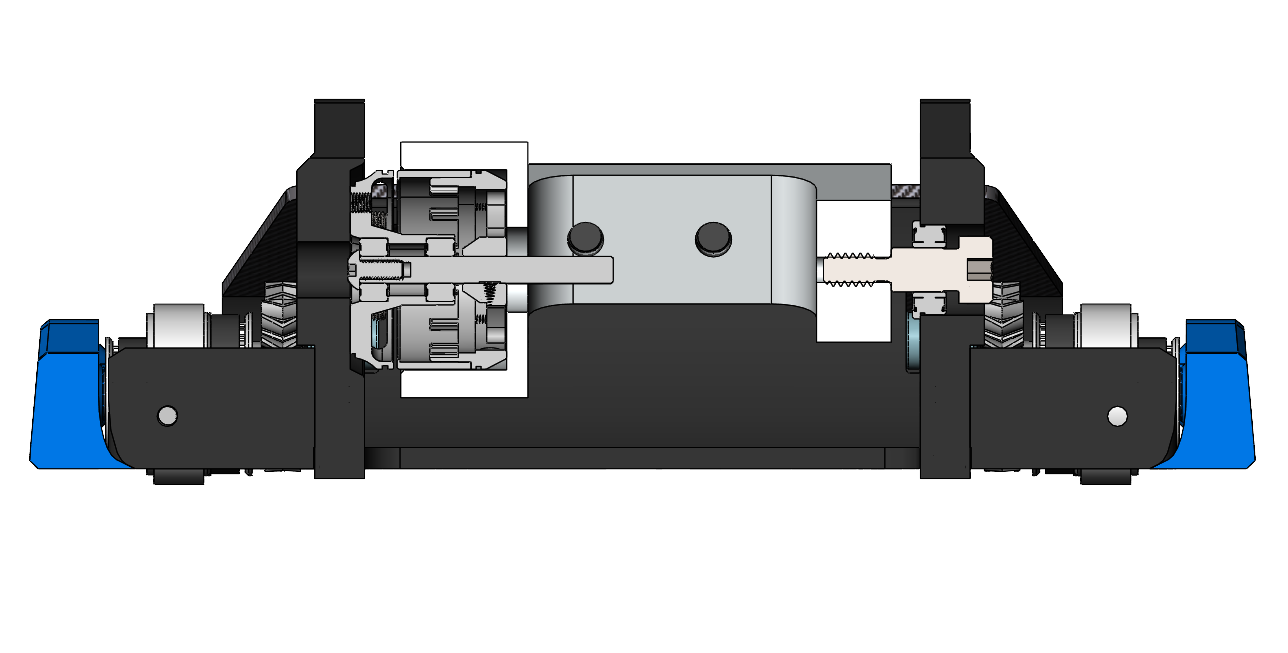
A section view of the weapon system
For the weapon system, I went with a "drum" or "egg-beater" spinner design. This consists of a wide vertically spinning hunk of material that hits other robots upwards. Its width allows the driver to be somewhat imprecise with the aim of the weapon.
The weapon body is made from 7075 Aluminum for additional hardness and stiffness, and alloy steel flat-head screws are used as hard impactors for striking other robots. The weapon is constructed with an aluminum inner body with screw impactors to facilite ease of manufacturing and help reduce costs. Ideally a weapon could be made and machined completely out of a steel-billet and then hardened, but it would cost quite a bit!
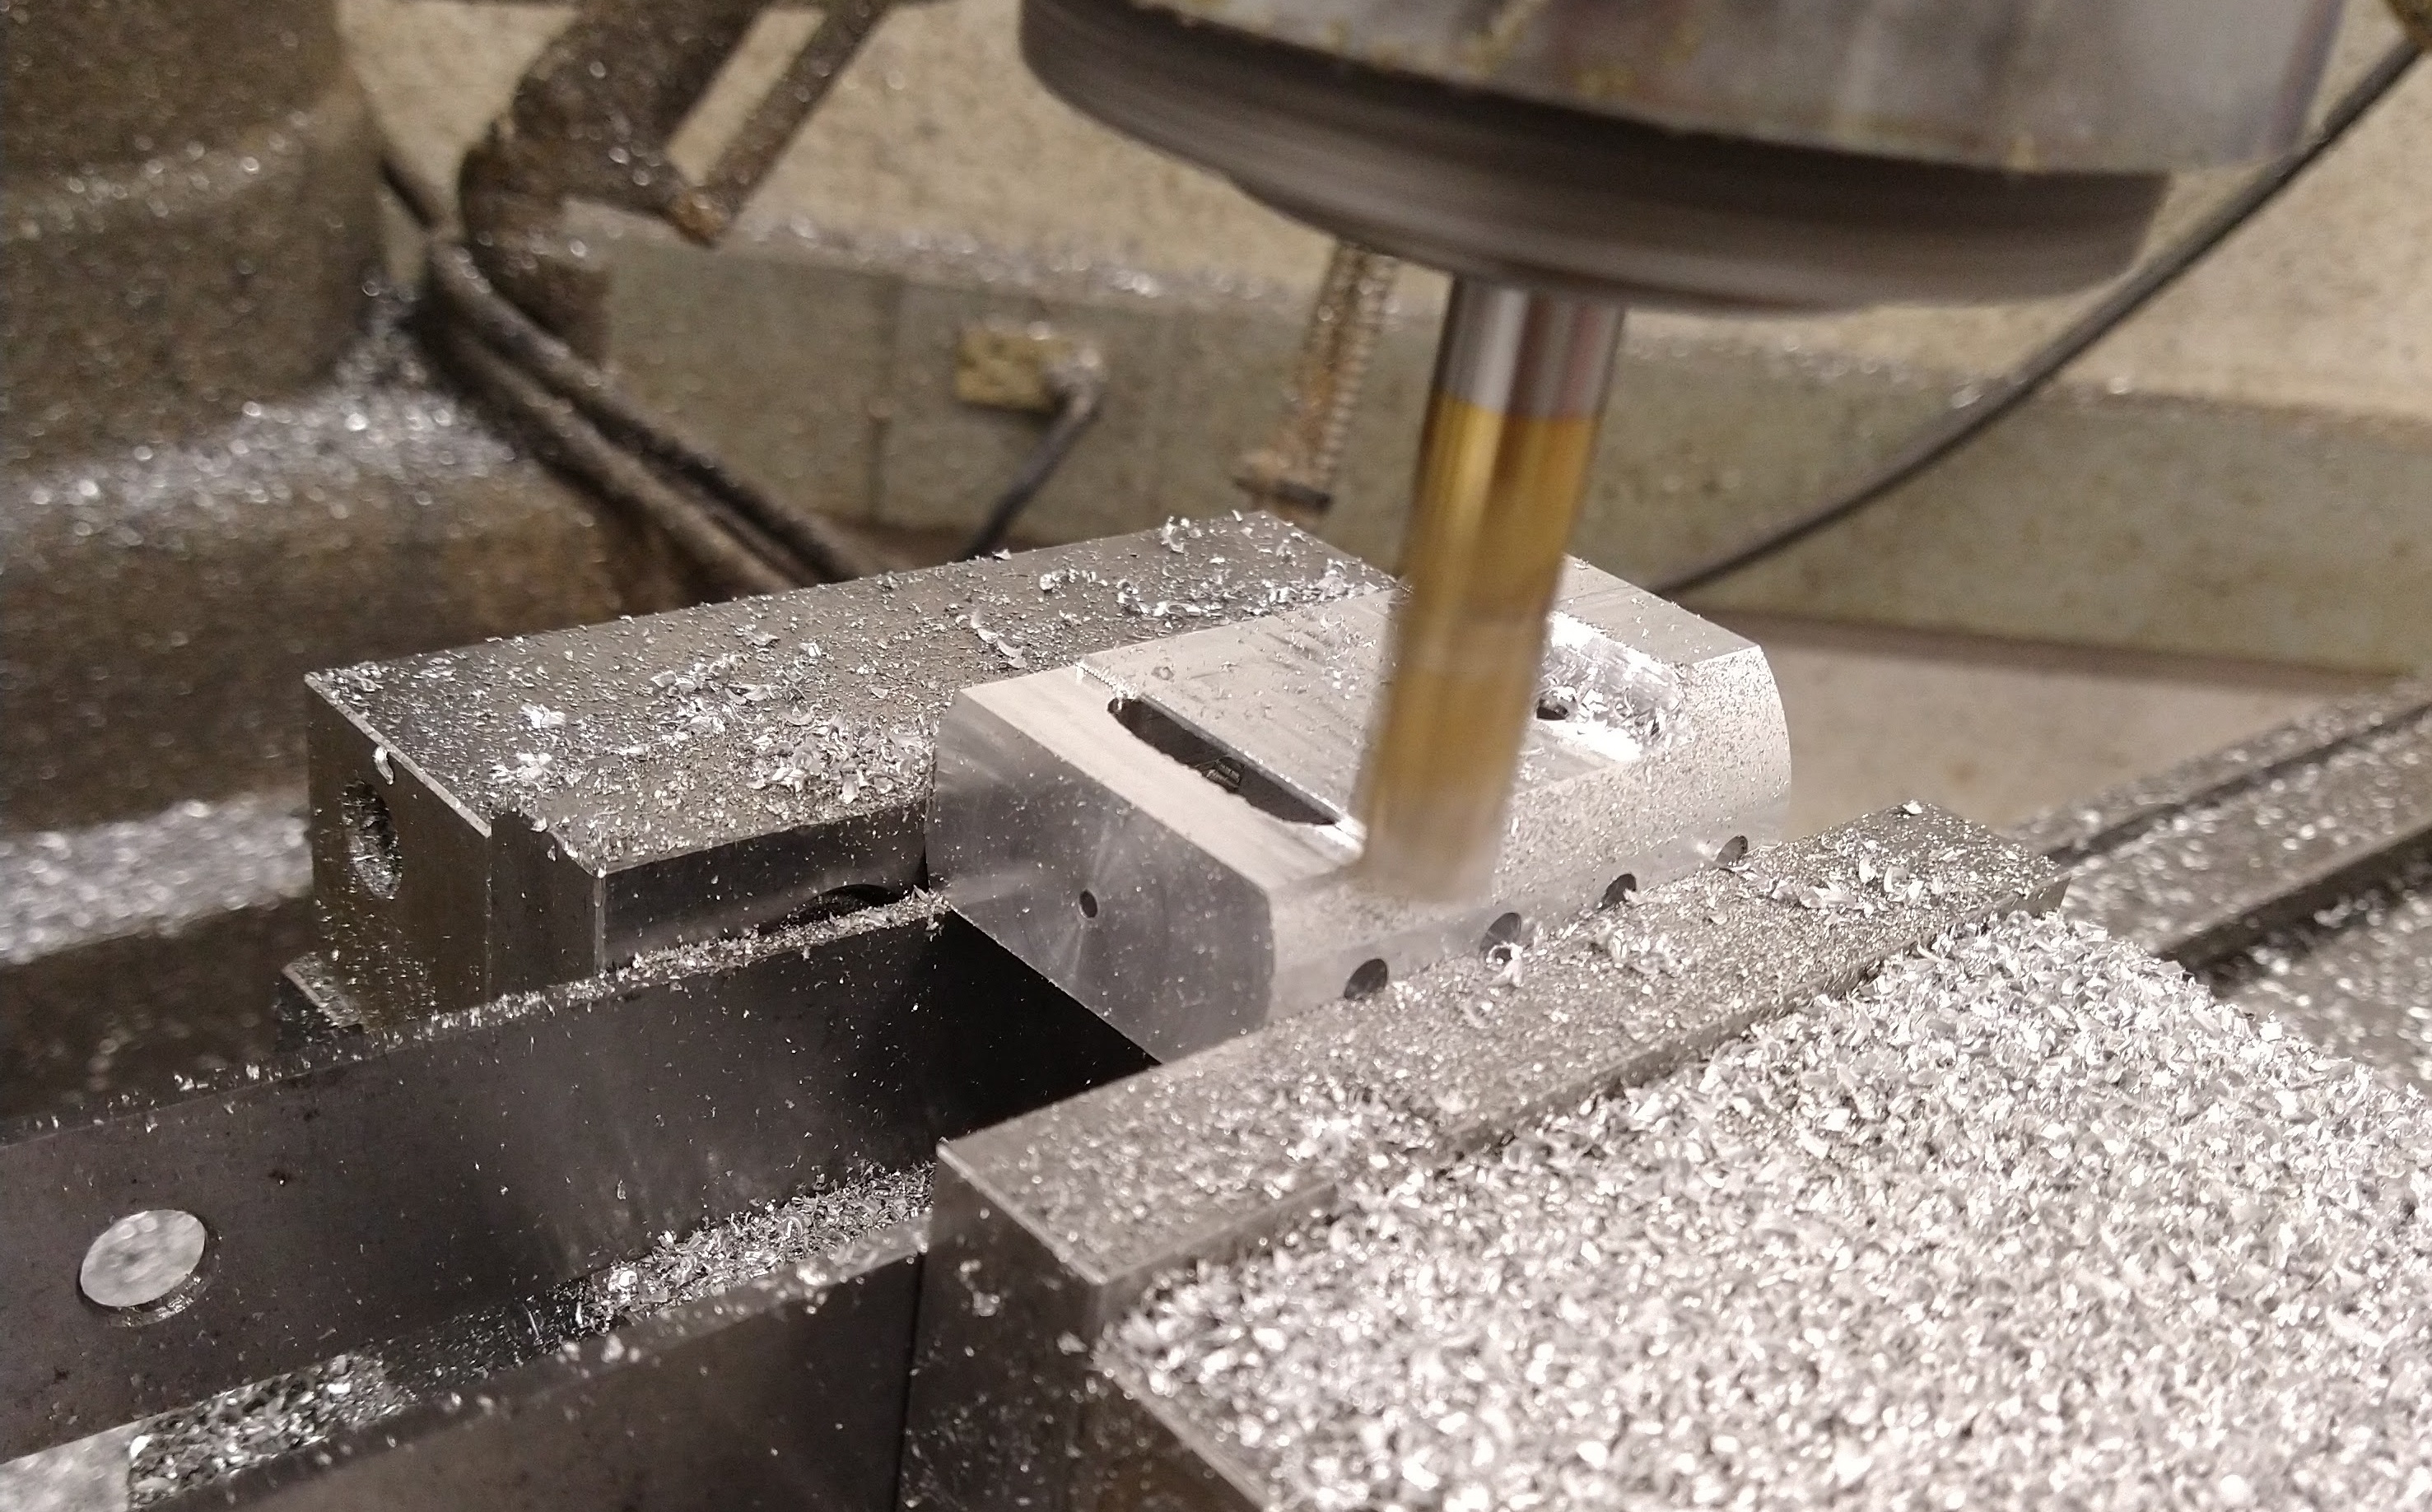
Manual milling the weapon
Finished Product!
As an exercise in improving my machining skills, I milled the first iteration of the weapon on our school's bridgeport mill over 6 grueling hours. Knowing the requirements for my part, I could set up my machining operations and tolerances such that I could ensure that critical tolerances were hit. Having a metal weapon to show off at competitions which I had machined was a rewarding experience, but after seeing how little I could buy a weapon CNC machined overseas, I had my next iterations made that way.
Armor + Chassis
The chassis on the robot features a center section constructed of 3 interlocking pieces: A center-body, and two upright supports that that slot in. The chassis is constructed in multiple parts to facilitate better 3D-printing of the frame, and to optimally orient layer lines so that a crack cannot propogate through layer lines and crack an upright.
As for materials, the chassis is made from CoPA nylon which has excellent impact resistance for a 3D printed material, and it is further treated after printing by boiling the material which hydrates and anneals the nylon, greatly increasing its toughness. The side wheel-guard armor pieces are not critical for the structure, and so they are made from TPU, a flexible 3D printed material which is incredibly resilient to impacts and squishes and deforms to absorb the shock of weapon impacts.
Design Iterations
In order to get to the current refined design of Eclipse/Moonshot, there were previous iterations which were built and that I learned from. Most notably, the original version of the design took on a very different form. The robot was much larger than the current iteration, and had to be printed with very thin walls in order to make weight. This was the critical issue with this design, I had not put enough work into optimizing the size of the robot, and as a result it was incredibly fragile.
The constructed v1 prototype of Eclipse
Eclipse after it took a big hit in a match and was ripped in half
This design did not perform spectacularly, but I gained some important information. I learned that decreasing the size would be necessary for success. And also importantly, I had learned much more about what gear ratio would be required, and more about the maximum torque and power that the motors I supplied could output. The robot was very twitchy and not super responsive, meaning I probably needed a touch more torque than I currently had, but the robot drive around without overworking its motors, so I knew I was at least in the correct ballpark. In the second iteration, I knew I had to shoot for a slightly higher reduction than what I had, but I was not off by much.
Results
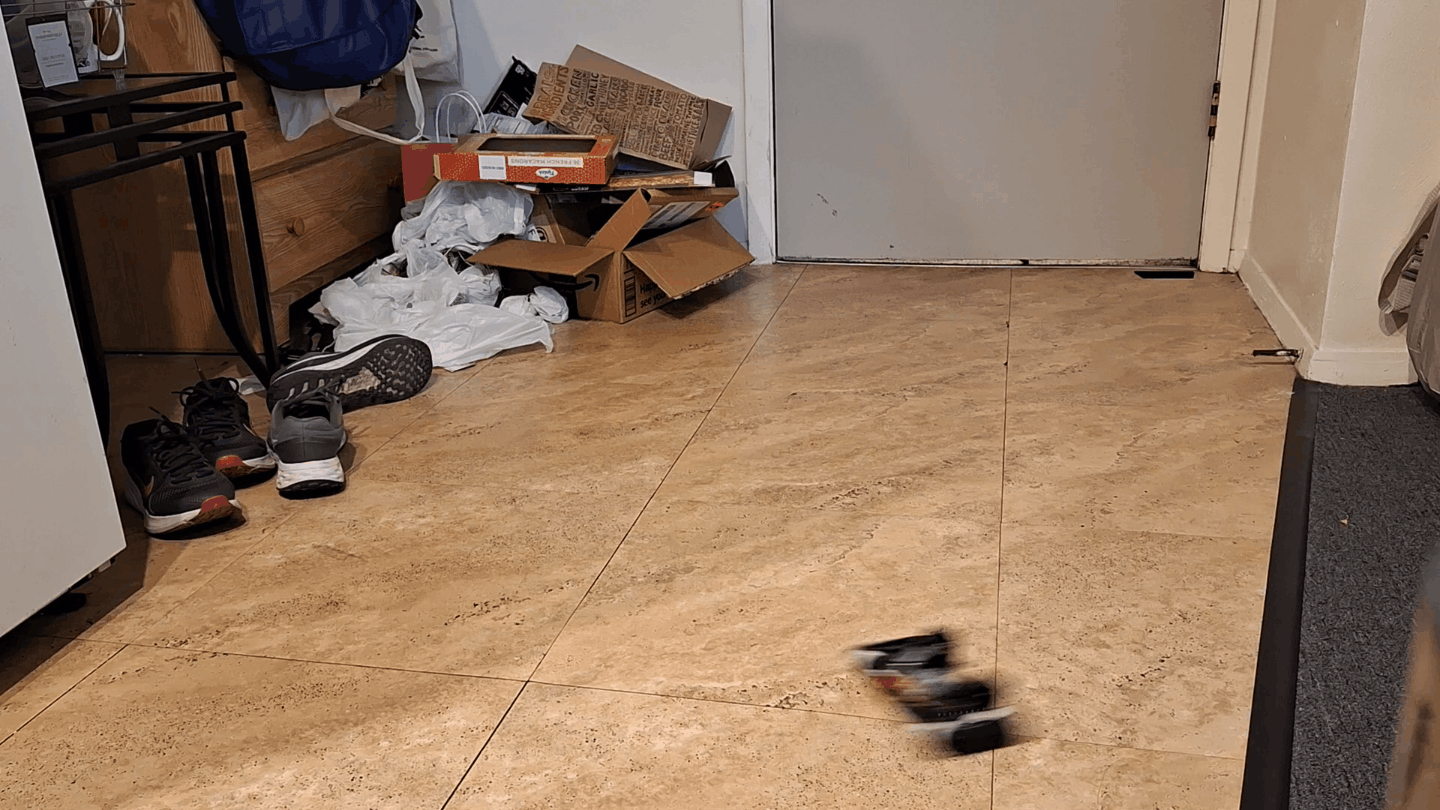
Some test driving on my apartment floor, showing off impressive drive speed
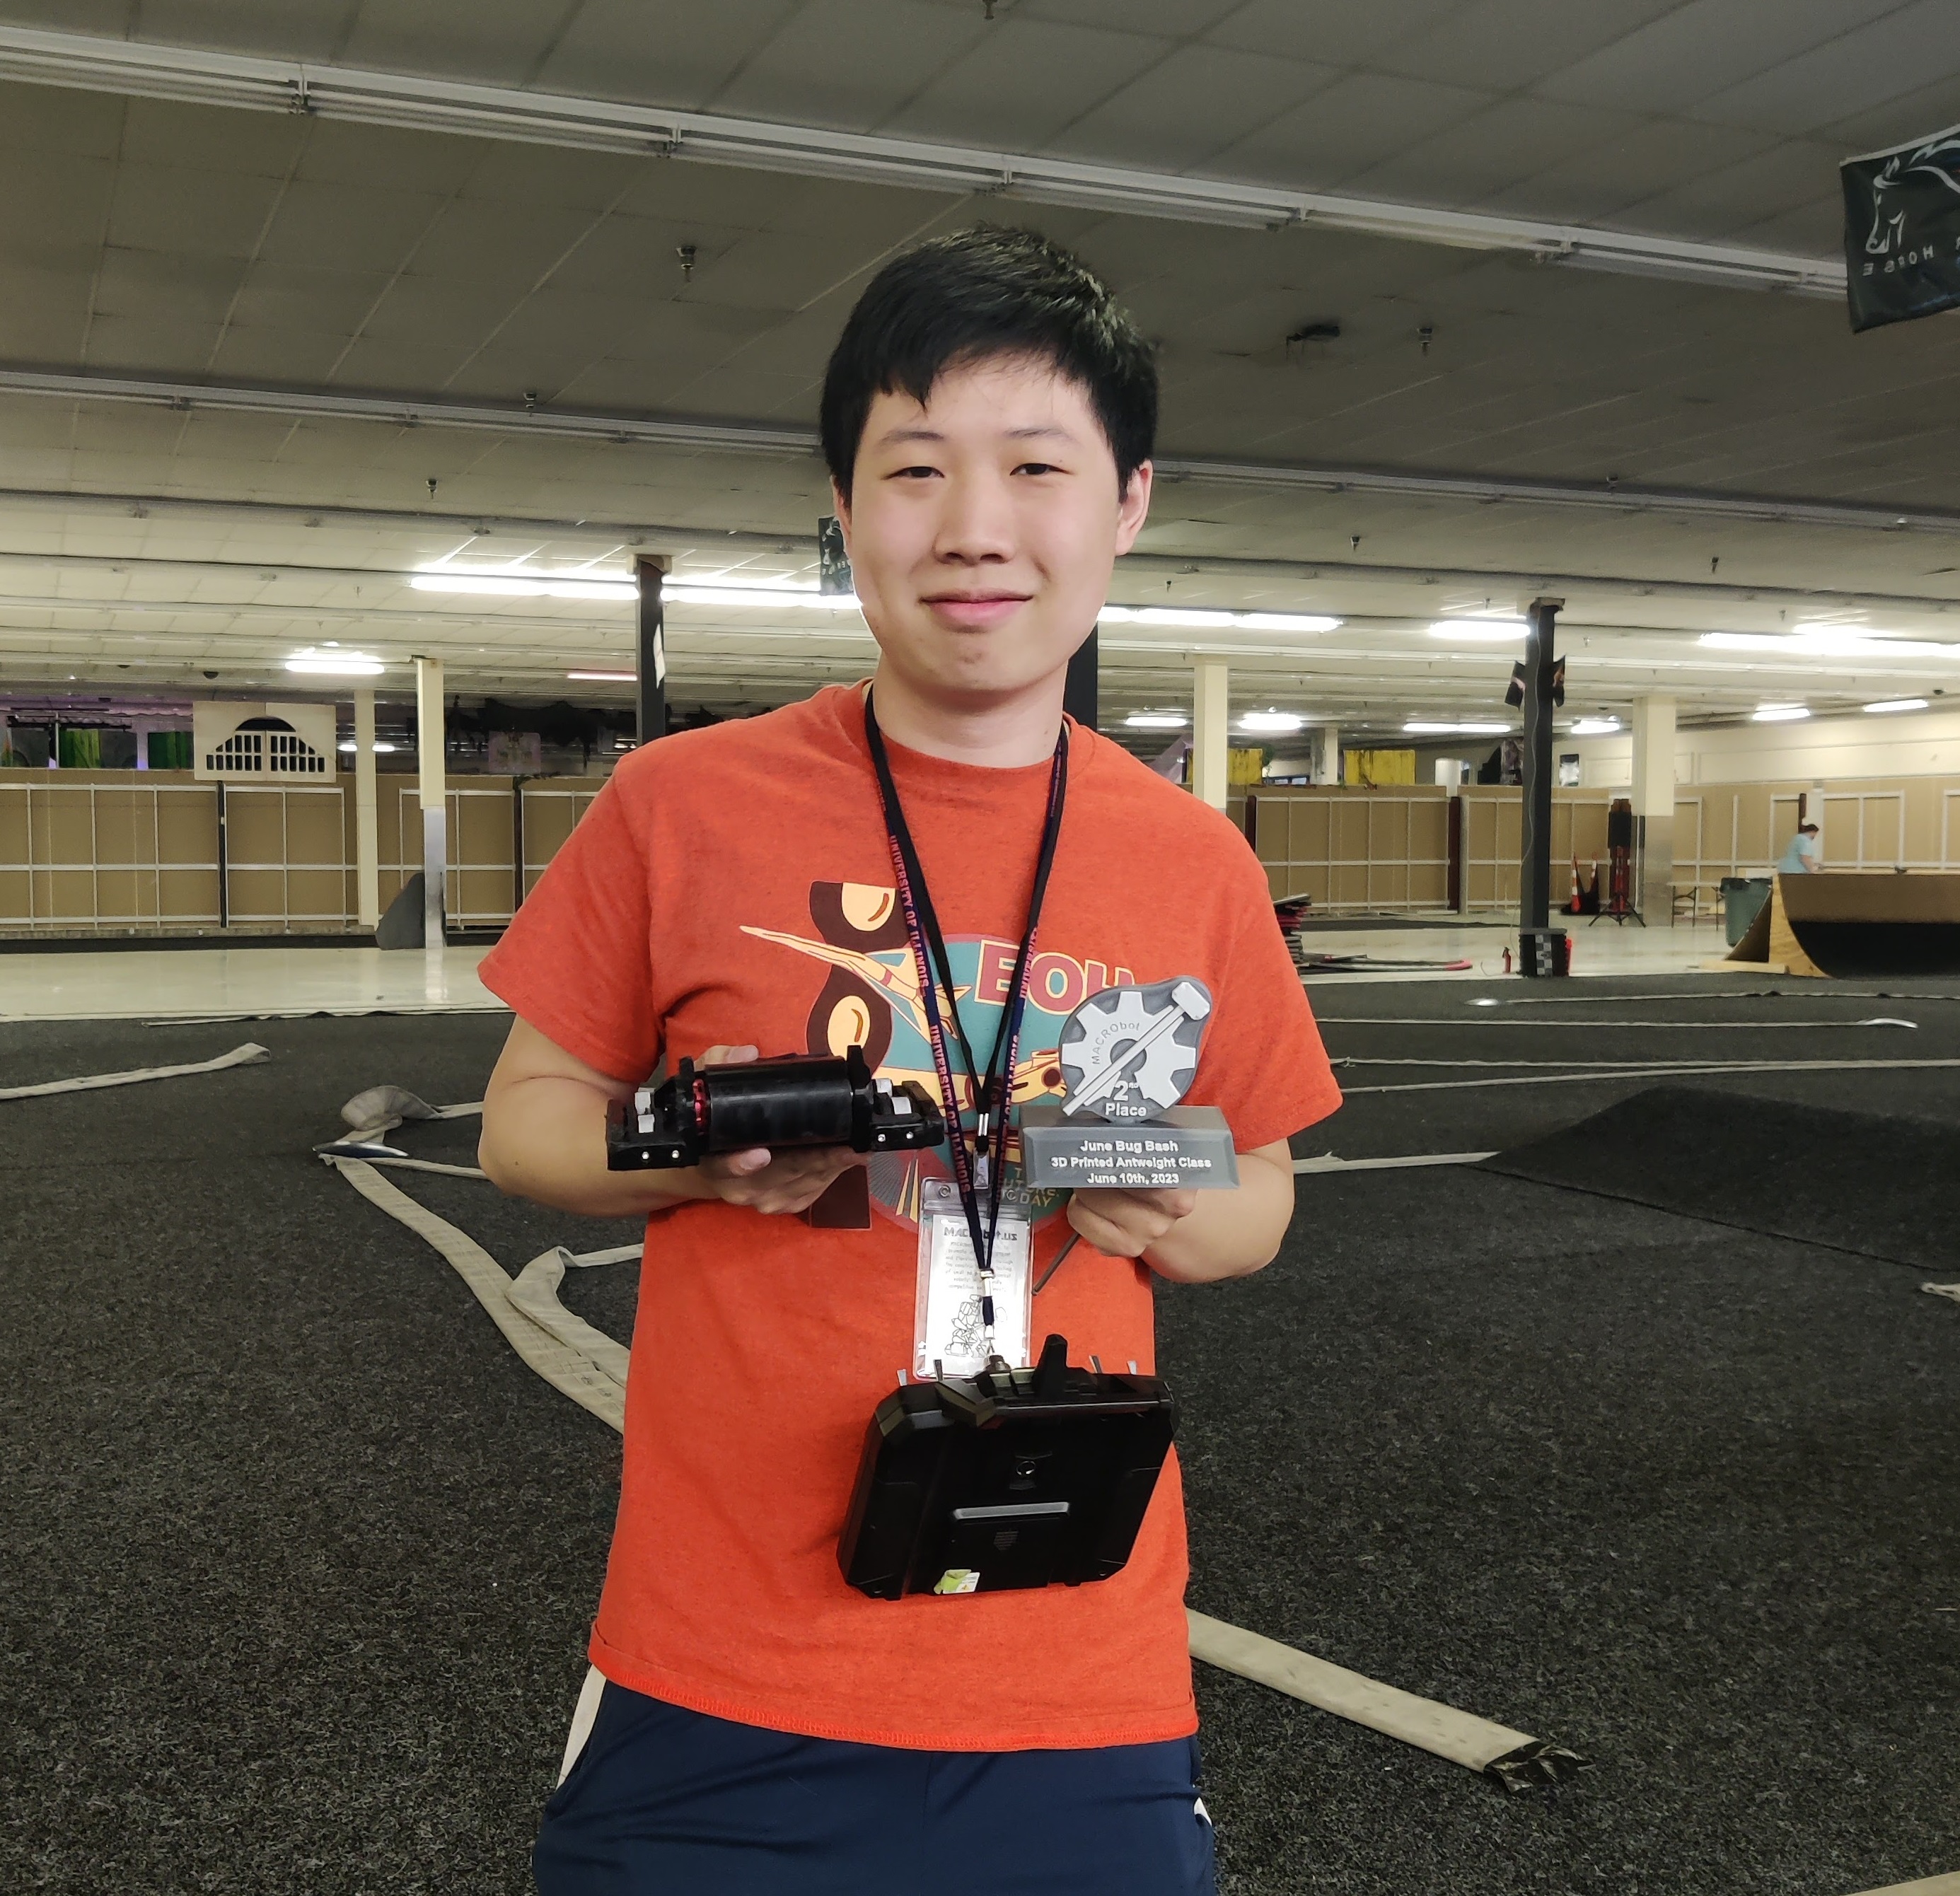
Second Place!